Installing Nginx, MySQL, PHP (LEMP) Stack on Ubuntu 18.04
Prerequisites
You should use a non-root user account with sudo privileges.
1. Install Nginx
Let’s begin by updating the package lists and installing Nginx on Ubuntu 18.04. Below we have two commands separated by &&. The first command will update the package lists to ensure you get the latest version and dependencies for Nginx. The second command will then download and install Nginx.
sudo apt update && sudo apt install nginxOnce installed, check to see if the Nginx service is running.
sudo service nginx statusIf Nginx is running correctly, you should see a green Active state below.
● nginx.service - A high performance web server and a reverse proxy server
   Loaded: loaded (/lib/systemd/system/nginx.service; enabled; vendor preset: enabled)
   Active: active (running) since Wed 2018-05-09 20:42:29 UTC; 2min 39s ago
     Docs: man:nginx(8)
  Process: 27688 ExecStart=/usr/sbin/nginx -g daemon on; master_process on; (code=exited, status=0/SUCCESS)
  Process: 27681 ExecStartPre=/usr/sbin/nginx -t -q -g daemon on; master_process on; (code=exited, status=0/SUCCESS)
 Main PID: 27693 (nginx)
    Tasks: 2 (limit: 1153)
   CGroup: /system.slice/nginx.service
           ├─27693 nginx: master process /usr/sbin/nginx -g daemon on; master_process on;
           └─27695 nginx: worker process
You may need to press q to exit the service status.
2. Configure Firewall
If you haven’t already done so, it is recommended that you enable the ufw firewall and add a rule for Nginx. Before enabling ufw firewall, make sure you add a rule for SSH, otherwise you may get locked out of your server if you’re connected remotely.
If you get an error “ERROR: could find a profile matching openSSH”, this probably means you are not configuring the server remotely and can ignore it.
Now add a rule for Nginx.
Enable ufw firewall.
Press y when asked to proceed.
Now check the firewall status.
That’s it! Your Nginx web server on Ubuntu 18.04 should now be ready.
3. Test Nginx
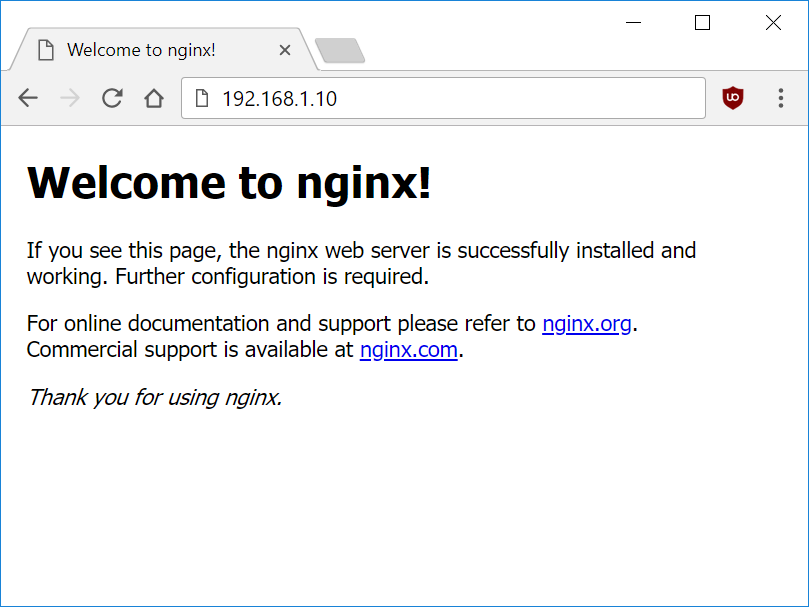
Go to your web browser and visit your domain or IP. If you don’t have a domain name yet and don’t know your IP, you can find out with:

You can find this Nginx default welcome page in the document root directory /var/www/html. To edit this file in nano text editor:
To save and close nano, press CTRL + X and then press y and ENTER to save changes.
Your Nginx web server is ready to go! You can now add your own html files and images the the /var/www/html directory as you please.
However, you should acquaint yourself with and set up at least one Server Block for Nginx as most of our Ubuntu 18.04 guides are written with Server Blocks in mind. Please see article Installing Nginx on Ubuntu 18.04 with Multiple Domains. Server Blocks allow you to host multiple web sites/domains on one server. Even if you only ever intend on hosting one website or one domain, it’s still a good idea to configure at least one Server Block.
If you don’t want to set up Server Blocks, continue to the next step to set up MySQL.
4. Install MySQL
Let’s begin by updating the package lists and installing MySQL on Ubuntu 18.04. Below we have two commands separated by &&. The first command will update the package lists to ensure you get the latest version and dependencies for MySQL. The second command will then download and install MySQL.
Press y and ENTER when prompted to install the MySQL package.
Once the package installer has finished, we can check to see if the MySQL service is running.
If running, you will see a green Active status like below.
You may need to press q to exit the service status.
5. Configure MySQL Security
You should now run mysql_secure_installation to configure security for your MySQL server.
If you created a root password in Step 1, you may be prompted to enter it here. Otherwise you will be asked to create one. (Generate a password here)
You will be asked if you want to set up the Validate Password Plugin. It’s not really necessary unless you want to enforce strict password policies for some reason.
Press n and ENTER here if you don’t want to set up the validate password plugin.
If you didn’t create a root password in Step 1, you must now create one here.
Generate a strong password and enter it. Note that when you enter passwords in Linux, nothing will show as you are typing (no stars or dots).
Press y and ENTER to remove anonymous users.
Press y and ENTER to disallow root login remotely. This will prevent bots and hackers from trying to guess the root password.
Press y and ENTER to remove the test database.
Press y and ENTER to reload the privilege tables.
All done!
As a test, you can log into the MySQL server and run the version command.
Enter the MySQL root password you created earlier and you should see the following:
You have now successfully installed and configured MySQL for Ubuntu 18.04! Continue to the next step to install PHP.
6. Install PHP
Unlike Apache, Nginx does not contain native PHP processing. For that we have to install PHP-FPM (FastCGI Process Manager). FPM is an alternative PHP FastCGI implementation with some additional features useful for heavy-loaded sites.
Let’s begin by updating the package lists and installing PHP-FPM on Ubuntu 18.04. We will also install php-mysql to allow PHP to communicate with the MySQL database. Below we have two commands separated by &&. The first command will update the package lists to ensure you get the latest version and dependencies for PHP-FPM and php-mysql. The second command will then download and install PHP-FPM and php-mysql. Press y and ENTER when asked to continue.
Once installed, check the PHP version.
If PHP was installed correctly, you should see something similar to below.
Above we are using PHP version 7.2, though this may be a later version for you.
Depending on what version of Nginx and PHP you install, you may need to manually configure the location of the PHP socket that Nginx will connect to.
List the contents for the directory /var/run/php/
You should see a few entries here.
Above we can see the socket is called php7.2-fpm.sock. Remember this as you may need it for the next step.
7. Configure Nginx for PHP
We now need to make some changes to our Nginx server block.
The location of the server block may vary depending on your setup. By default, it is located in /etc/nginx/sites-available/default.
However, if you have previously set up custom server blocks for multiple domains in one of our previous guides, you will need to add the PHP directives to each server block separately. A typical custom server block file location would be /etc/nginx/sites-available/mytest1.com.
For the moment, we will assume you are using the default. Edit the file in nano.
Press CTRL + W and search for index.html.
Now add index.php before index.html
/etc/nginx/sites-available/default
Press CTRL + W and search for the line server_name.
Enter your server’s IP here or domain name if you have one.
/etc/nginx/sites-available/default
Press CTRL + W and search for the line location ~ \.php.
You will need to uncomment some lines here by removing the # signs before the lines marked in red below.
Also ensure value for fastcgi_pass socket path is correct. For example, if you installed PHP version 7.2, the socket should be: /var/run/php/php7.2-fpm.sock
If you are unsure which socket to use here, exit out of nano and run ls /var/run/php/
/etc/nginx/sites-available/default
Once you’ve made the necessary changes, save and close (Press CTRL + X, then press y and ENTER to confirm save)
Now check the config file to make sure there are no syntax errors. Any errors could crash the web server on restart.
If no errors, you can reload the Nginx config.
8. Test PHP
To see if PHP is working correctly on Ubuntu 18.04, let’s a create a new PHP file called info.php in the document root directory. By default, this is located in /var/www/html/, or if you set up multiple domains in a previous guide, it may be located in somewhere like /var/www/mytest1.com/public_html
Once you have the correct document root directory, use the nano text editor to create a new file info.php
Type or paste the following code into the new file. (if you’re using PuTTY for Windows, right-click to paste)
/var/www/html/info.php
Save and close (Press CTRL + X, then press y and ENTER to confirm save)
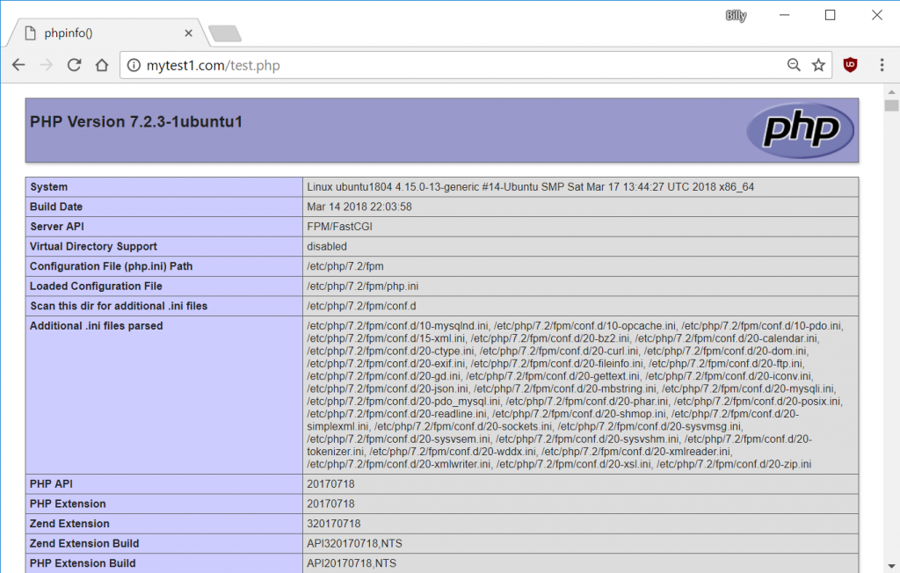
You can now view this page in your web browser by visiting your server’s domain name or public IP address followed by /info.php: http://your_domain_or_IP/info.php
phpinfo() outputs a large amount of information about the current state of PHP. This includes information about PHP compilation options and extensions, the PHP version and server information.
You have now successfully installed PHP-FPM for Nginx on Ubuntu 18.04 LTS (Bionic Beaver).
Make sure to delete info.php as it contains information about the web server that could be useful to attackers.
Last updated
