Installing Apache on Ubuntu 18.04 with Multiple Domains
Prerequisites
You should use a non-root user account with sudo privileges.
1. Install Apache
Let’s begin by updating the repositories and installing Apache. Press y and ENTER if prompted to install.
sudo apt update && sudo apt install apache2Installation may take a few minutes. Once installed, continue to Step 2 to configure the firewall.
2. Configure Firewall
It is highly recommended that you configure a firewall for added security.
We’ll start by adding a firewall rule for SSH because if you are configuring your server remotely, you don’t want to get locked out when enabling the firewall!. If the rule already exists, the command will just skip it.
sudo ufw allow OpenSSHIf you get an error “ERROR: could find a profile matching openSSH”, this probably means you are not configuring the server remotely and can ignore it.
Now we can add the firewall rules for Apache.
sudo ufw allow in "Apache Full"Now enable the firewall if it isn’t already.
sudo ufw enablePress y if you see a message “Command may disrupt existing ssh connections”.
If the firewall was activated correctly, you should see “Firewall is active and enabled on system startup“.
You can also check the current firewall status with:
Above we can see the firewall is active and has two rules per service. v6 is short for IPv6. This is the new Internet Protocol, which was introduced to deal with the long-anticipated problem of IPv4 address exhaustion.
3. Test Apache
To see if Apache installed correctly, we can check the current Apache service status.
If it is up and running, you should see a green active state.
If you get the above error about a fully qualified domain name, you can ignore it.
You may need to press q to exit the server status.
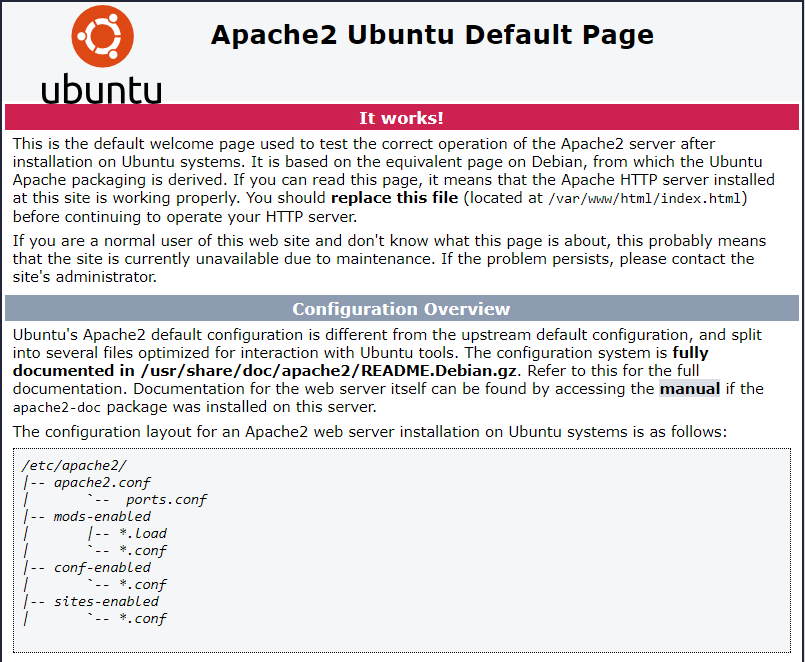
Now that the Apache service is up and running, you should be able to view the test Apache web page through your web browser. Enter the IP address of your server in the address bar and hit ENTER.
If you don’t know your IP, you can find out with the following command.

You’re all set! You can find this Apache default welcome page in the folder /var/www/html. To edit this file:
Press CTRL + X to exit the nano text editor.
Your Apache web server is ready to go. You can now add your own html files and images the the /var/www/html directory as you please. However, you should acquaint yourself with and set up at least one Virtual Host for Apache in the next step as most of our Ubuntu 18.04 guides are written with Virtual Hosts in mind.
Virtual Hosts allow you to host multiple web sites/domains on one server. Even you only ever intend on hosting one website or one domain, it’s still a good idea to configure at least one Virtual Host.
4. Set Up Virtual Hosts
If you wish to host multiple sites/domains on Apache, you should now set up your directory structures and Virtual Hosts. Even if you only want to host one site/domain, it’s a good idea to set up a directory and Virtual Host now because if you ever need to add a new domain later, it will makes things a lot easier for you.
For the purposes of this guide, we will make a virtual host for mytest1.com and another for mytest2.com. You can substitute these with your own registered domains, or if you don’t have any domains yet, you can still follow this guide and add mytest1.com and mytest2.com to your hosts file to trick your OS into resolving these domains in the browser. We explain how to do this at the end of the guide.
4.1. Create Directories and Set Permissions
Let’s create two new directories in the /var/www/ directory for our two domains.
We must also change the permissions for the general web directory /var/www and its contents so that pages can be served correctly.
4.2. Create Test Web Pages
We’ll now create a simple index.html web page for each domain using nano text editor.
Don’t forget to replace mytest1.com with your own domain if you have one.
Paste in the following (If using PuTTY, right-click to paste).
/var/www/mytest1.com/public_html/index.html
Save and exit (press CTRL + X, press Y and then press ENTER)
Now do the same for mytest2.com.
Paste in the following (If using PuTTY, right-click to paste).
/var/www/mytest2.com/public_html/index.html
Save and exit (press CTRL + X, press Y and then press ENTER)
4.3. Create New Virtual Host Files
The Virtual Host files located in /etc/apache2/sites-available/ are used to tell the Apache web server how to respond to various domain requests.
Let’s create a new virtual host file for our mytest1.com domain.
In nano, paste in the block below. To paste into nano, press the right mouse button.
/etc/apache2/sites-available/mytest1.com.conf
Be sure to change all instances of mytest1.com to your own domain if you have one.
Save and close nano (Press CTRL + X and then press y and ENTER to save changes)
We can now repeat the above process for mytest2.com.
In nano, paste in the block below. To paste into nano, press the right mouse button.
/etc/apache2/sites-available/mytest2.com.conf
Be sure to change all instances of mytest2.com to your own domain if you have one.
Save and close nano (Press CTRL + X and then press y and ENTER to save changes)
4.4. Enable the New Virtual Host Files
Now that we have our two virtual host files in place, we need to use the a2ensite tool to enable them.
Remember again to replace mytest1.com and mytest2.com with your own domains.
Test the configuration syntax for errors.
You can ignore any errors that say Could not reliably determine the server’s fully qualified domain name.
If you see Syntax OK, restart Apache.
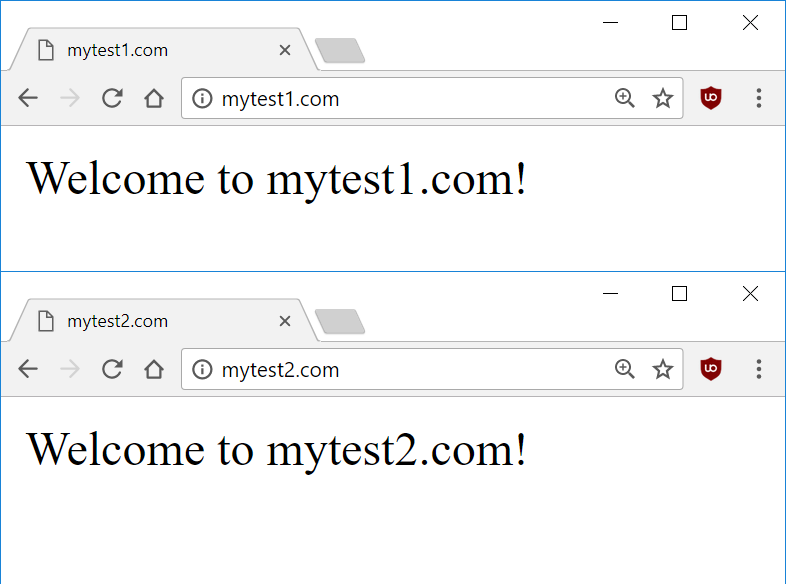
Assuming you have already configured DNS on your domain registrar to point your domains to the IP of your Apache server, you should now be able to view these test webpages in the web browser. If you don’t have your own domains and just want to test, continue to Step 4.5 to edit your hosts file.

4.5 Edit Hosts file (optional)
If you do not have any domains registered and instead just want to load mytest1.com and mytest2.com as a test, you can edit the hosts file in your OS to point these domains to your server.
To edit hosts file in Linux or Mac, run sudo nano /etc/hosts. In Windows, follow this guide to edit hosts. Once hosts files is open, enter two new lines
hosts
Replace x.x.x.x with your web server’s IP.
If you don’t know your web server’s IP, you can find out with:
Once you’ve saved you hosts file, you should be able to access mytest1.com and mytest2.com in your browser.
5. Configure Apache (Optional)
Now that you have Apache up and running, there may be some common configuration changes that will be useful to you.
5.1. Enable AllowOverride
You will find that .htaccess will be ignored by default in Apache. If this is something you will need, we can enable it by altering the Apache configuration file.
Firstly, backup the configuration file.
Open the config file.
Press CTRL + W and search for <Directory /var/www/>. Alternatively, scroll down to the following section:
/etc/apache2/apache2.conf
AllowOverride None means that .htaccess will be ignored. Change it to AllowOverride All.
/etc/apache2/apache2.conf
Save and exit (press CTRL + X, press Y and then press ENTER)
Restart Apache.
5.2. Disable directory listing
Apache by default will list contents of your directories without indexes (index.html, index.php). This is a security risk because it could allow hackers to browse your web server looking for scripts.
You can disable this feature by deleting Indexes (in red below) from the Apache configuration file.
/etc/apache2/apache2.conf
Save and exit (press CTRL + X, press Y and then press ENTER)
Restart Apache.
5.3. Enable mod_rewrite
If you want to later configure some rules in .htaccess, you will most likely need to enable mod_rewrite.
Restart Apache.
6. Disable Default Virtual Host (optional)
If you configured virtual hosts and visit your server via IP, you may still see the default Apache test page.

This page may generate unnecessary access and error logs due to bots and spiders. To disable:
Add this anywhere within the <VirtualHost *:80> block.
/etc/apache2/sites-available/000-default.conf
Save and exit (press CTRL + X, press Y and then press ENTER)
Restart Apache.
Now when you visit your server via IP, you should see a forbidden message.
7. Apache Logs
To view the Apache error log and access log files, we can use tail to display the last 200 entries.
To output appended data as the logs grows, use -f.
Last updated