How to configure Postfix to use Gmail SMTP on Ubuntu 18.04 & 16.04 | LeetDev
In this article we are going to configure Postfix to relay mail through Gmail’s SMTP server on Ubuntu 18.04 & 16.04. If you want to use a SMTP server other than Gmail, please see How to configure Postfix to use an External SMTP Server.
Prerequisites
If your Gmail account uses 2-Step Verification, you must create an application specific password.
If you’re not using 2-Step Verification, please ensure that your Gmail account is configured to allow less secures apps.
1. Install Postfix
If you’ve already installed Postfix, skip to step 2.
Let’s update the package database first.
sudo apt-get updateInstall mailutils, which will automatically install Postfix.
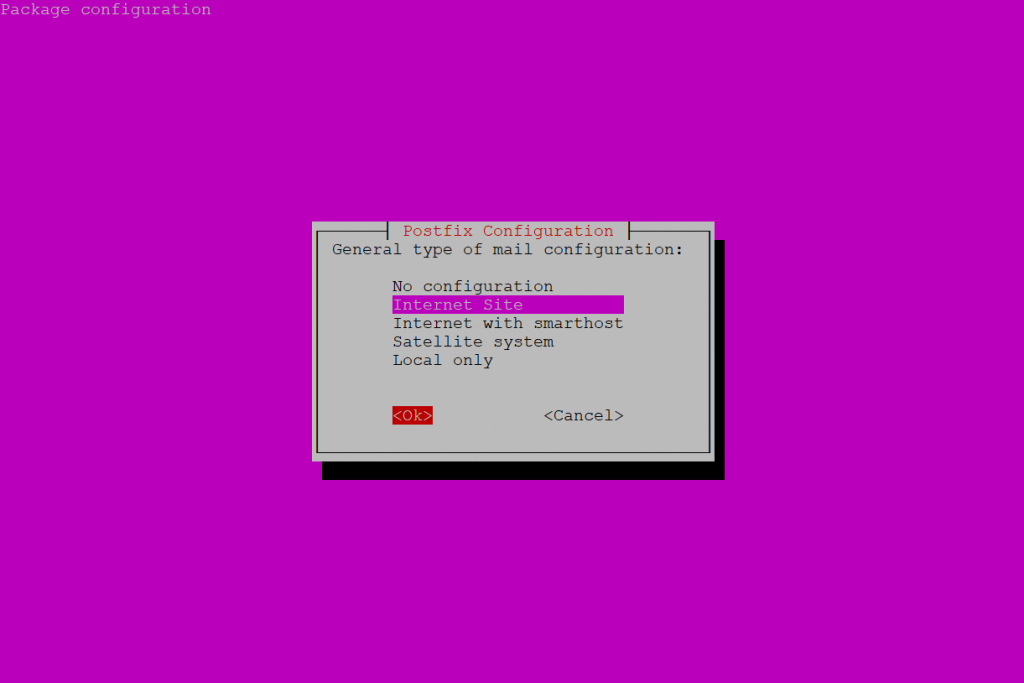
sudo apt install -y mailutilsOn the first Postfix configuration screen, select OK by pressing TAB and ENTER

Select Internet Site and press ENTER.
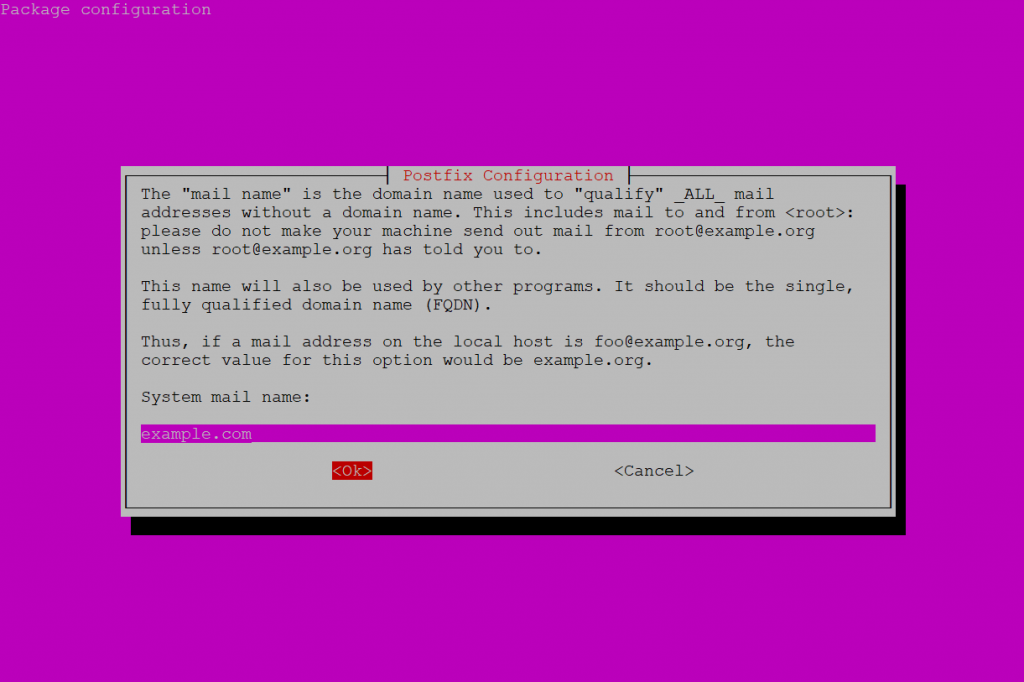
System mail name should be your domain name eg. example.com, press ENTER.
Package should now be installed.
2. Configure Postfix
Edit the Postfix configuration file.
Find the following line relayhost = about 6 lines up from the bottom of the file and delete it.
Add the following to the end of the file.
/etc/postfix/main.cf
Save file and exit. (Press CTRL + X, press Y and then press ENTER)
3. Create Password and DB Files
Create the sasl_passwd file which will store our credentials.
Insert the following:
/etc/postfix/sasl_passwd
Replace username and password with your own.
Save file and exit. (Press CTRL + X, press Y and then press ENTER)
Create a hash database file for Postfix with the postmap command.
There should now be a file called sasl_passwd.db in the /etc/postfix/ directory.
For added security, we will only allow root user to read and write to sasl_passwd and sasl_passwd.db
4. Sign Certificate
Now we are going to create the certificate.
There should now be a certificate file called cacert.pem in /etc/postfix
5. Send a Test Mail
We’ll now send a test email message. Make sure to replace [email protected] with your own email address.
Don’t forget to check your spam folder.
If you still haven’t received any mail, check the mail error log.
If the mail log is empty or doesn’t exist, try parsing the syslog. This will return the last 50 entries for postfix.
If the syslog is empty and you still haven’t received any test email, it’s possible that the test email was rejected by the recipient server. You should check to see if anything has bounced back to your mail folder.
Press uppercase G to scroll to the bottom of the file and lowercase q to quit. The $(whoami) variable returns the currently logged in user.
Note: Sending Mail to Your Own Domain
If you ever intend to send email from postfix to your own domain, [email protected] for example, postfix may need some further configuration. Please see article Can’t send mail to own domain. Postfix: status=bounced (unknown user: “user”)
Last updated